Monday, January 29, 2007
Some pictures of Alex and Cooper
As tara pointed out, I have been neglecting to post some pictures of Alex.
Here are some dope videos of Alex and Cooper playing. I took them about a month ago, when she was about 13 months. I know it is pretty low quality, but it is all I got.

Tuesday, January 23, 2007
furniture project 3
I can tell people aren't that interested with the ins-and-outs of how I made this wine cabinet. So I will make the conclusion of this story brief:
step 13)drawers: cut the dovetails.
this required a dovetail jig and a router to do.
as you can see, dovetails create dovetail-shaped "pins" that fit together like a puzzle. There is no room for error.
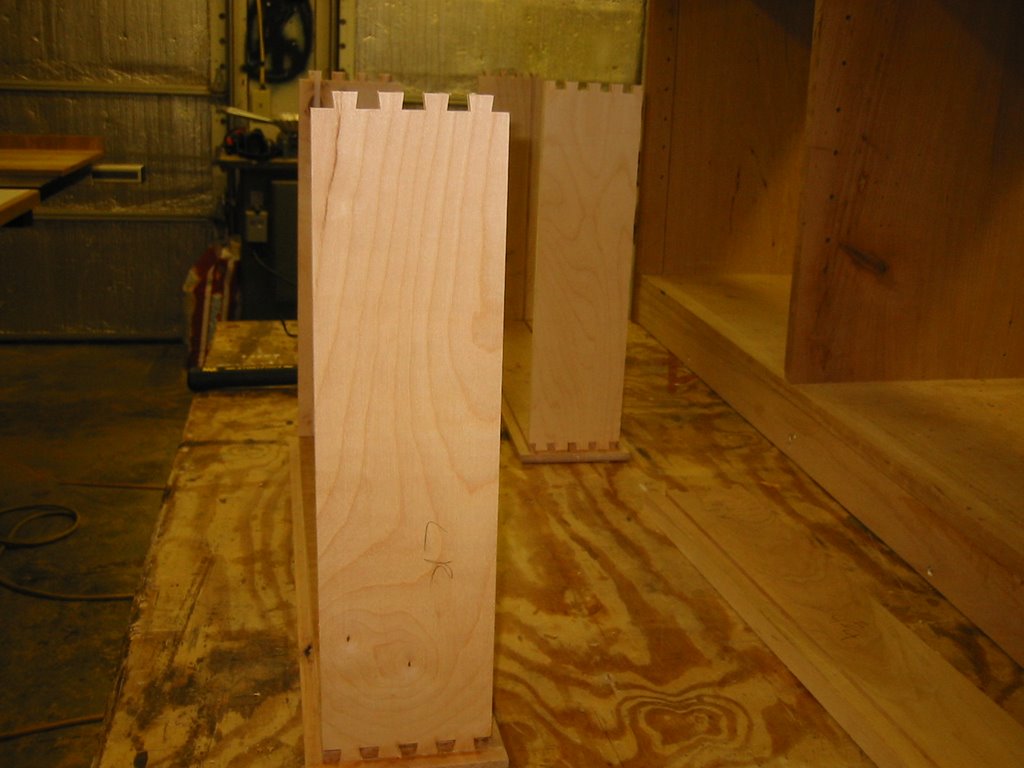
I really like this look, and most high-quality drawers are made this way.
this seemed like it is fairly complicated to do, and I had never done it before, but after reading the instructions to the jig, it was quite easy. It did, however, take alot of prep time and any mistakes are costly. I made one mistake, but it was an easy fix.
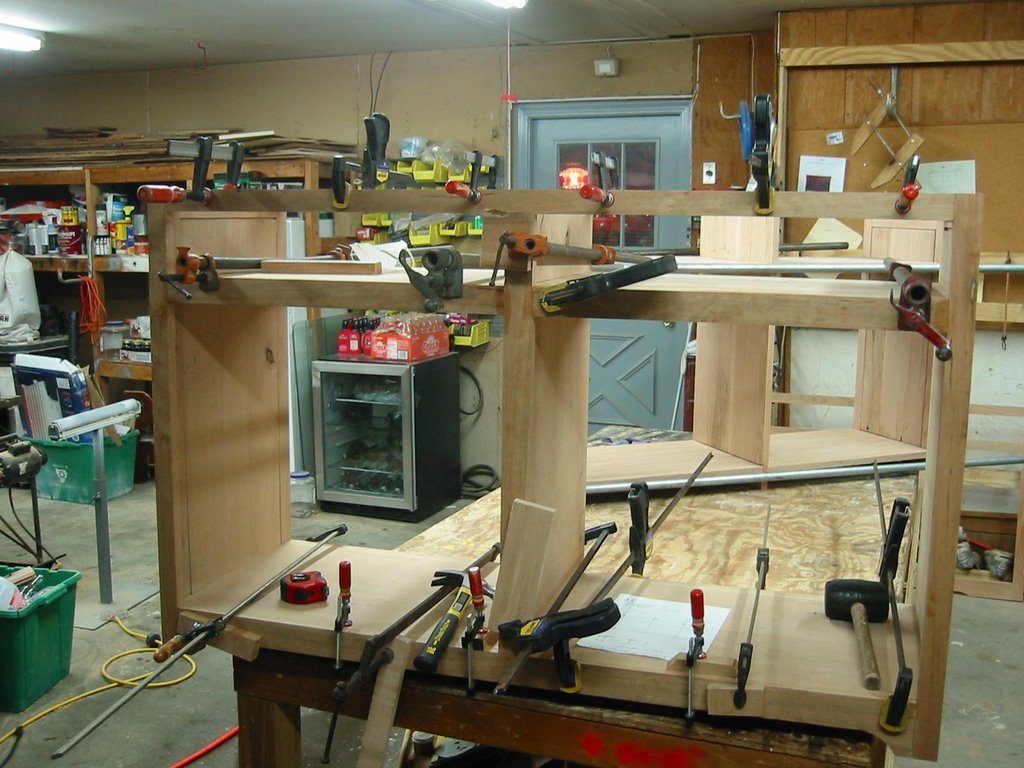
step 14) drawers: glue them together
this is actually kinda difficult. you have to put togeher 5 peices of a puzzle at once, within 10 minutes or so or your glue will dry.
the bottom of the drawer is pre-finished cherry, the sides are birch plywood, and the front and back is cherry hardwood. As you will see in the finished product, the wood contrasts really look good!
here is a picture of a drawer glued up and clamped.

step 15) build the wine rack.
I wanted this peice to be able to be used as a wine cabinet, or just a curio/china cabinet. With this in mind I wanted to be able to have:
a) a removable wine rack
b) hidden stemware holders
c) glass doors
d) have adjustable interior shelves (for different sized curios)
the stemware holder and glass doors were a snap compared to the removeable wine rack.
I wanted my wine rack to be the popular "X" type, where bottles are essentially stacked on one another. (as opposed to single cubby-holes per wine bottle)
After talking to some people, and thinking and drawing up some ideas, i opted to make a 2 half-lap panels that had sloppy enough engagments to where they could fold a little bit and slip out of the interior of the cabinet.
To get a better idea of what I am saying, make the Vulcan hand sign in both hands. now make it to where the web inbetween the middle and ring finger of both hands touch. see how if you look at your hands right, they look like an "x"? that is what i needed to do.
unfortunatly I don't have many pictures of this and I am certain you are still lost. So I wasted everyones time with that half-hearted explanation. perfect.
step 16) build the stemware holders
this was pretty easy. I made a bunch of "T"s and 2 "L"s and screwed them on. They weren't going to be seen at all with the doors closed (see step 15 a) so it was okay If they were a bit sloppy. It did actually take me all lunch to figure out the dimesions of them, so that I could hold the maximum numbers of wine glasses, and have them be symmetric.
this is the view as you look into the cabinet from the front. glasses are turned upside down and the bases are inserted into those slots.

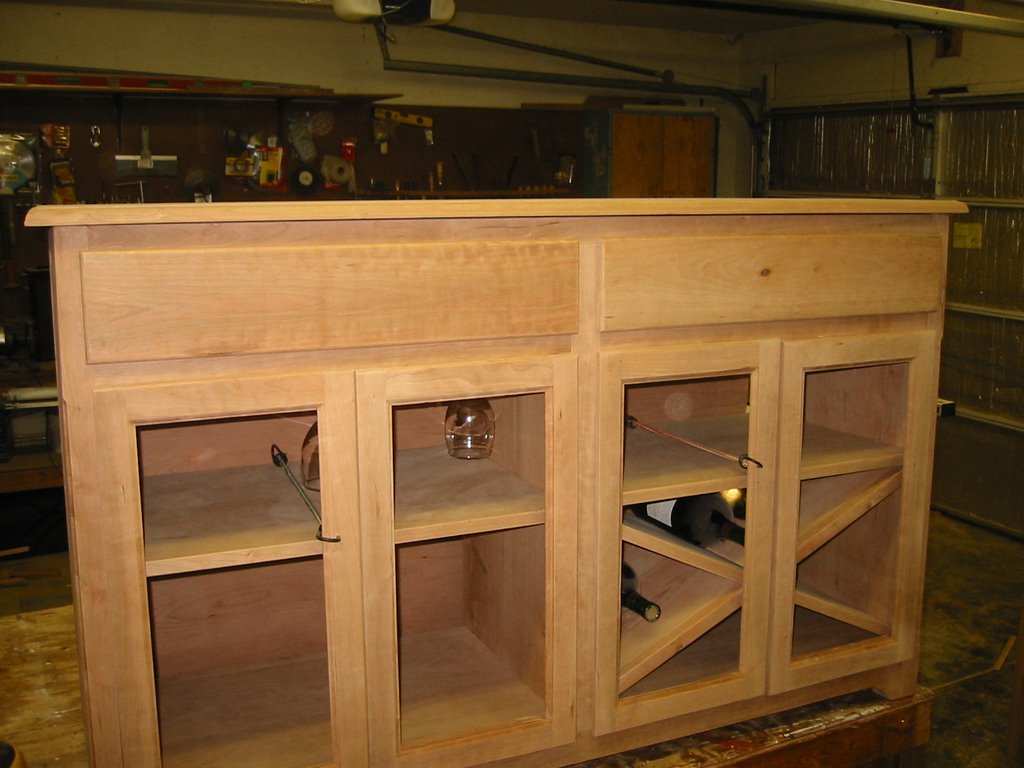
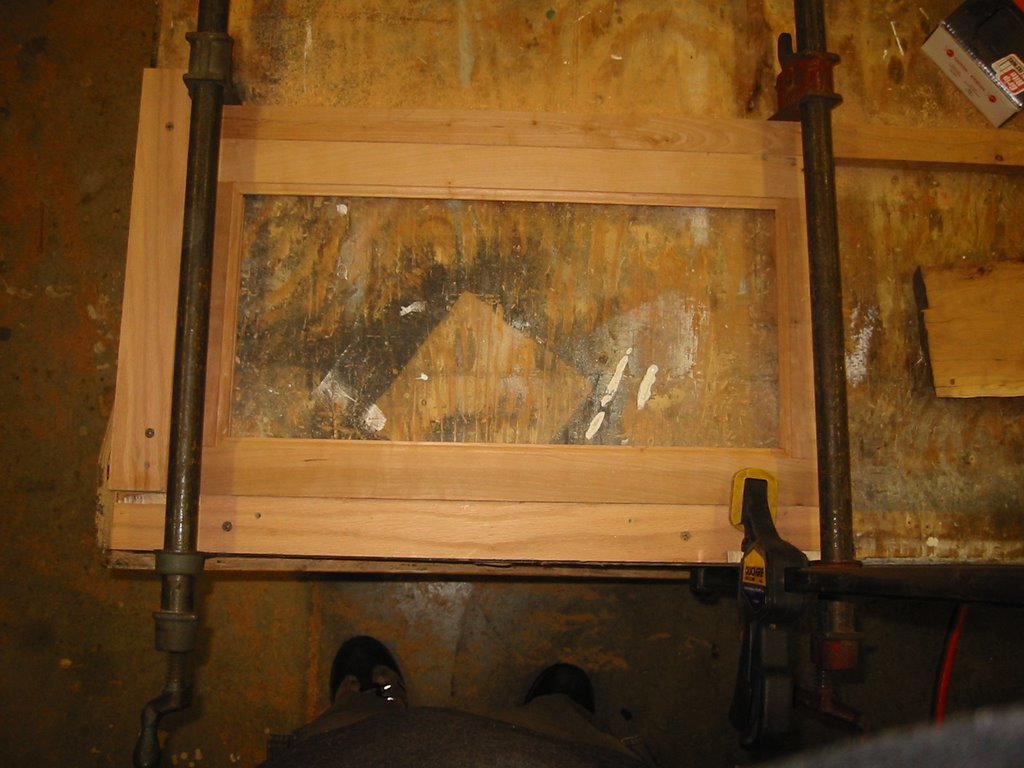
step 17) mock up the doors and drawers
with the drawers and doors finished, I needed to make sure everything fit before staining. It was a good thing I did too, because the doors needed to be trimmed to fit!
here is a picture of the mock up. I also put on the back, so I could get a vision of the final product. The doors are held on with bungee cords. those wont be permenent. :) The wine bottles inside might give you an idea of what I was talking about in step 15. also, there are some wineglasses in their holders.
step 18) drawer guides.
I had to make drawer guides to make sure the drawers slide easily.
step 19) Staining, finshing, and install hardware
staining took awhile because I couldn't make up my mind. I tried mutliple test-runs on parts of the cabinet you could not see. I asked many people, and then ended up making the wrong choice.
Long story short, it took about 3 full days to sand, wash(partially seal), stain, sand,re-stain, sand, and put 3 coats of lacquer on it. I made sure to get it really smooth. certain parts are as slick as glass (like the top, which is the first thing I check for on any peice of furniture I touch).
hardware (pulls and hinges) was easy. Just drill holes and make sure they are lined up with one another. The hinges on the doors were actually a bit tricky, but I was happy to see that the gap in between them was very small and looks great!
I fastened the top of the peice with screws.
the last step was to nail the back of the peice on, and then the glass in the slots of the doors and secure them with little wooden strips I cut.
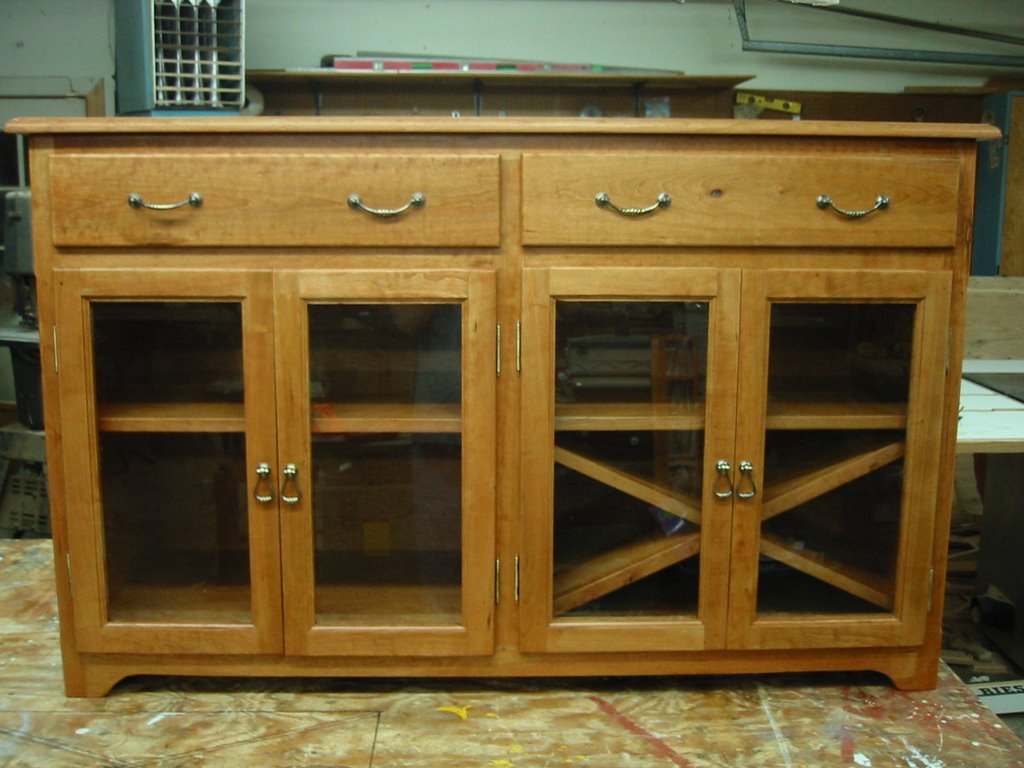
The end. I think it looks pretty glam. I have included multiple shots so that everyone can admire the various things I talked about (mistake on the top, paneled sides, the smooth top, dove-tailed drawers)
full frontal
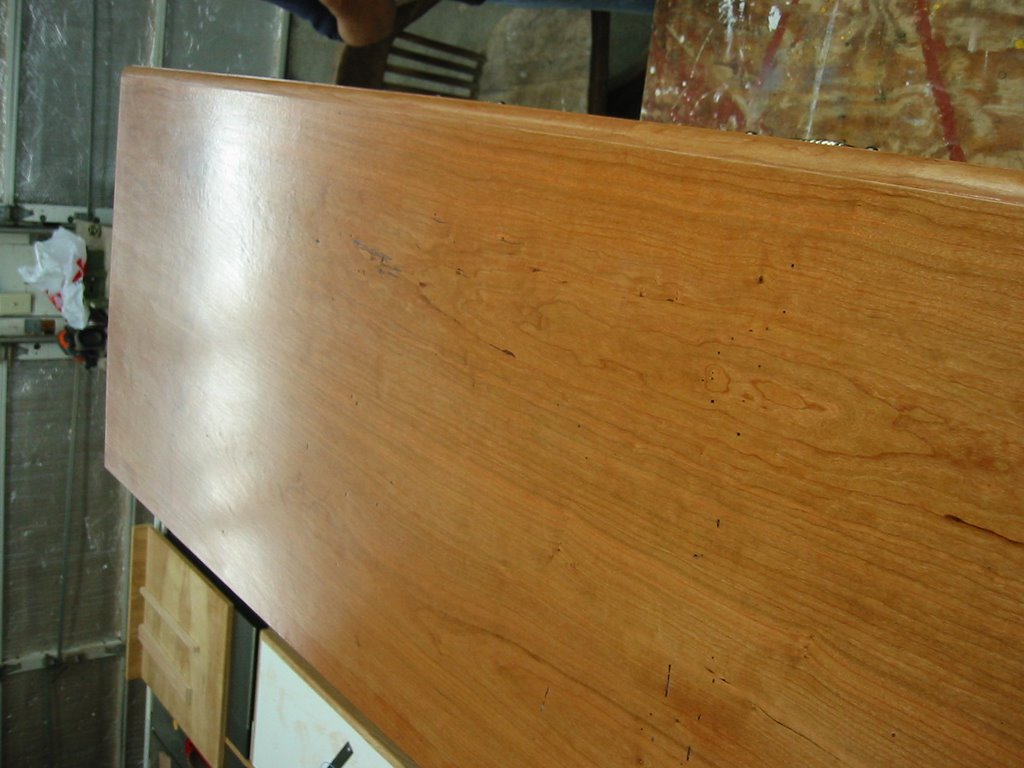
top. mirror shine! boo-ya! (click on this picture to see the beauty of the wood I chose for the top)
side view.

Friday, January 19, 2007
How to ruin a perfectly good finger
Now it is stubby, and ugly, and the nail is only about a 1/2 inch long. (I measured) It is a laughing-fest for my other 9 fingers and often has to be roused out of stints of deep morose.
As promised in this blog, I wanted to tell you the story of how it came to be this way.
but first, a Horrifying picture:
wait
for
it!
boo!

This is what my finger looked like about 2 weeks after running the sumbitch through a router. It essentially cut a dato in my finger and destroyed the bone right along with it.
the thing in the end is a pin that they shoved in the end to keep the end from falling off. the silver nail-looking thing is a peice of metal they put under my skin to keep my skin from growing over my nail bed.
you will notice that my index finger is bleeding. That was a walk in the park compared to the middle finger. it basically just had the nail cut through. However, the middle finger went straight up satan's asshole.
They say that losing parts of your hand is one of the most alarming parts of your body to lose. I guess that is becasue they are your primary feeling devices. Of course, I didn't lose entire fingers at the first knuckle, but it was a tad jolt to look down (after feeling a numb sting) and see somethign that looked like this:
Whoopsie-daisy

I am not exaggerating.
This happened because I was not paying attention and I set up the guard on the router table wrong. The peice of wood I was running through the router pinched between the router blade and the guard and launched it across the room (20 feet). My hand was holding the wood, and was pulled into the blade, the rest is history.
Fortunatly, I went to Kutz and Kleinerts at Jewish Hospital (in Louisville), which is arguably one the best hand surgery clinics in the country. I don't remember much, but I do remember my friends coming pre-surgery and not seeming that impressed with the amount of carnage they saw, and the surgeon trimming my finger bones down to "something he can work with". It sounded alot like the sounds that finger nail clippers make. I didn't ask if he was using finger nail clippers, but I really should have.
bubbles follow up
Here is a short clip of him from YouTube.
Watch out if you are work! He says several rated-R words:
http://www.youtube.com/watch?v=M-GqxYtCccc
Thursday, January 11, 2007
Trailer Park Boys
I suggest it to all. You can get most of the seasons from Netflix.
It is about 2 bumbling criminals from Canada and is shot documentary style. The acting is pretty bad, but the plot and reoccuring jokes are top notch.
everyone's favorite character is Bubbles, the slow and lovable ally to the 2 main characters that often is more thoughtful and moral than everyone else on the show. He also wears thick glasses, loves kitties, lives in a shack, and talks funny.
One of my favorite things about Bubbles is the way he makes money. He goes to one "mall" (a mini-mall actually) and takes the shopping carts and throws them down in a ravine by the parking lot. Then at night he fishes them out and repairs them at home. Then, he sells them to another nearby mall.
Brilliant!
once or twice he has been seen repairing carts or flipping them into ravines or dumpsters. It is really something.
Here is a picture of him with some guy. I photoshopped myself in to impress my friends. I thought I should share.
furniture project 2
step 7) build the face frame
the face frame is the part in the front of most peices like this that FACE the person looking at it. without it, the ends of the carcase face you and i think that makes the peice look cheap. (you might notice that the picture of the wine cabinet i was basing my design off of used this method. (go here to see it)
building the face frame wasn't too hard. In fact, it was one of my favorite parts of the project. I basically cut the peices to length, cut a dato in them, and stuck them on the front with glue and clamps.
in the picture below you can see the many clamps I used to hold the wood on while the glue set.
face frame
step 8) admire your progress
I cut a peice of 1/4 plywood for the back. this plywood was pre-stained and finished, so in the picture below it looks much darker than the unstained wood I have been working with.
I took the clamps off of the face frame and temporarly stuck it on the back so I can see how it looked.
this is how it looked:
very handsome
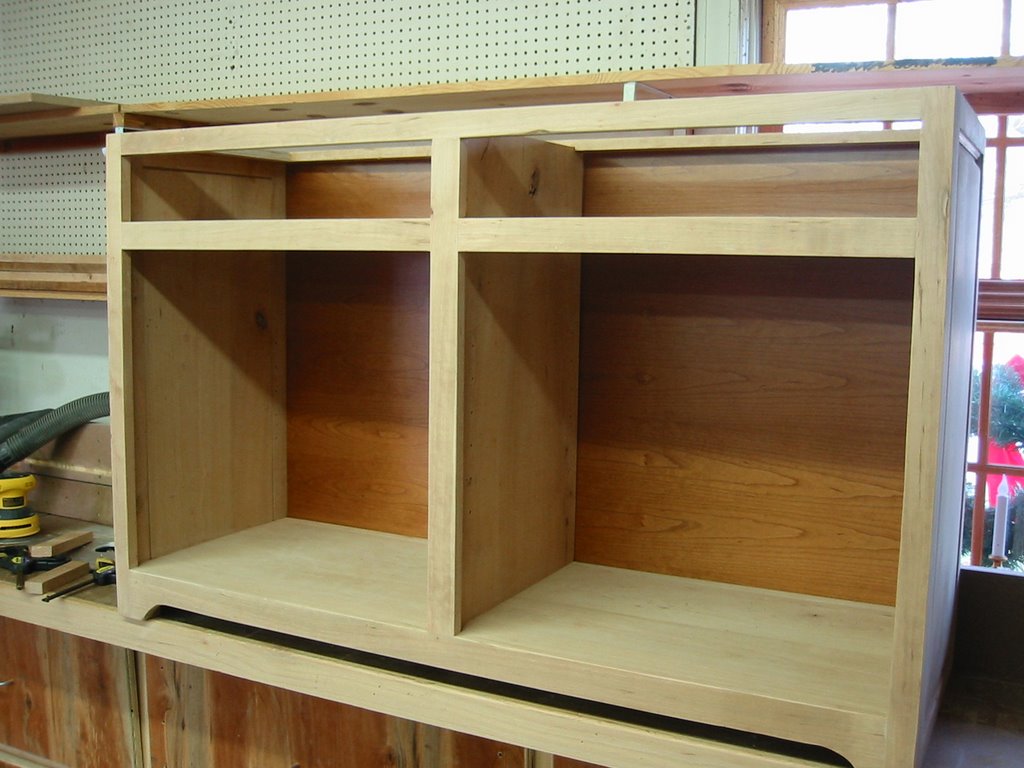
It is much easier to see the face frame here. You might also notice the gental sloping do-hicky on the bottom. It is easy to overlook on the pictures above. It is called a skirt, I guess.
I also might add that the face frame gives a little more thickness to the front of the peice. If I didn't use a face frame, the front would all be about 7/8 inches thick. Instead, most of the face frame peices were 1 1/2 inches thick or 2 inches thick.
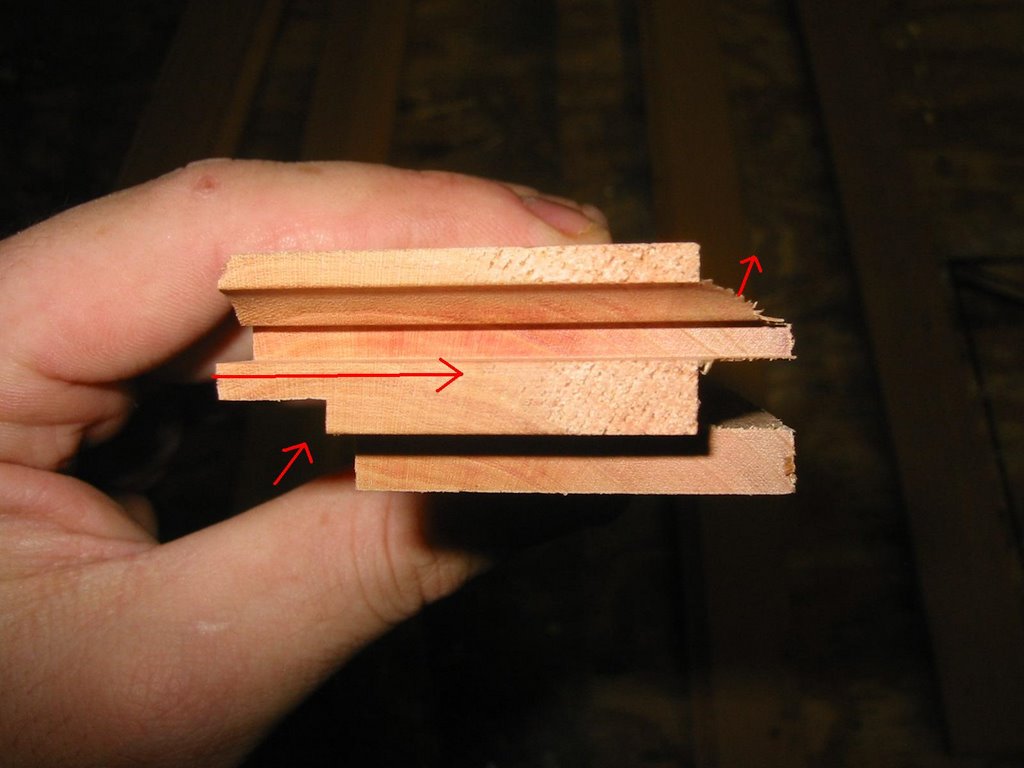
step 9) make the door rail and styles
AS you remember from looking at the design here, the doors hold glass so you can see the impressive amount of wine inside.
Making doors that hold glass and are not flimsy is no trivial task. I decided to make the doors the same way I made the side panels (see step 4). Instead of putting a wooden panel in the inside, I will jsut put glass inside.
each side of the door (rail or style, to use the proper parlance) required 3-4 runs through the router or table saw to create a rabbet, dato, or the decrotive rabbet. To make 4 doors, it required 16 peices of wood, so there was alot of cutting to be done. This also meant that many opportunities to mess up or create another dato in my flesh and bone*.
You can see 3 runs in the picture below on one of the rails. The arrows show which way the rabbet goes. 2/3 of the cuts go "into the picture".
rabbets and such in door rail
step 10) glue up the doors.
Then I glued the doors. I made a jig out of plywood and made sure it was at 90 degrees so that my doors would be square (or rectangle, I suppose). This is on the left and bottom of the picture and has screws in it. Then I glued and clamped em'!
foo
foo
foo
foo
foo
foo
foo
foo
step 11) Make a horrible mistake
In my (limited) experience making furniture, it is incredibly easy to make mistakes that cause major set backs. To not make a mistake that ould cost me a whole day of work is rare in a project of this scope. Luckly this one was easily mitigated (although It yeilded less than perfect results), and did not require an entire day.
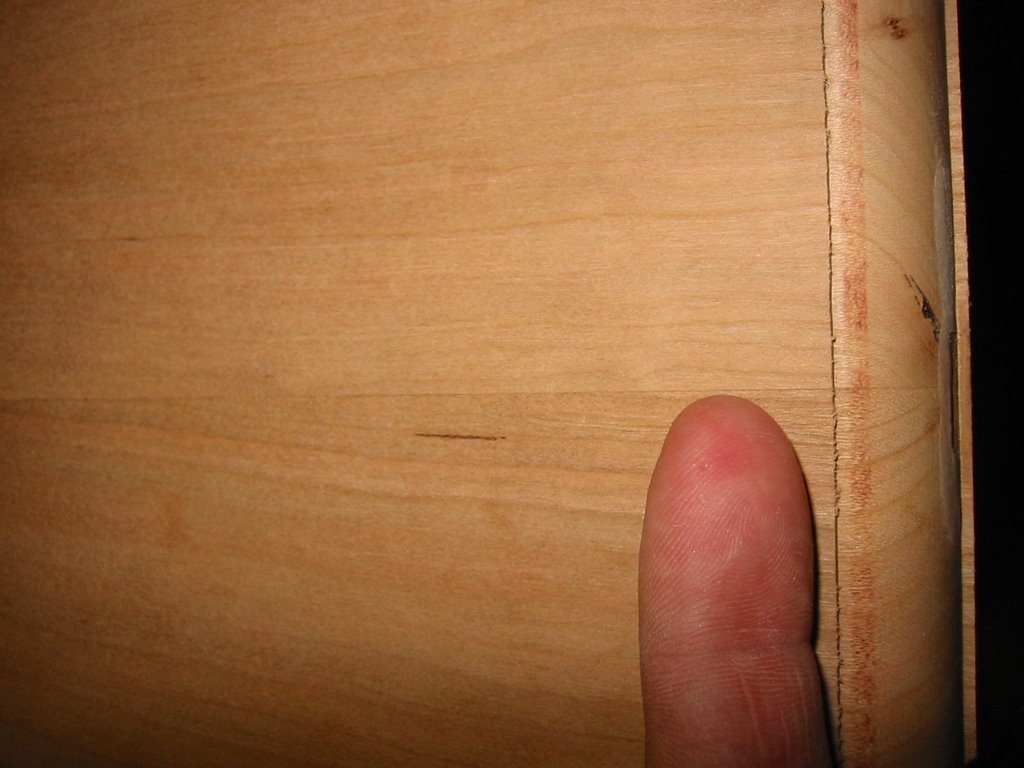
When I went to put the top on the carcase I noticed it was too small. So, I added another board to it. My original top board had only two boards and thus one joint. Look at your table tops at home. If they are solid wood, you will notice they are made of many smaller boards. If they are well made, they have very small joint lines. like this one:
This is a good joint. notice you can hardly see it! Booya!
foo
foo
foo
foo
foo
foo
foo
foo
Then I had to add the other board on (to add size) and I ended up getting a bad joint. This joint is big and full of glue. It is unsightly, but so far no one but me has noticed.

foo
foo
foo
foo
foo
foo
foo
I thought about completely re-doing the entire top, but decided just to keep the imperfection and not waste anymore wood or time.
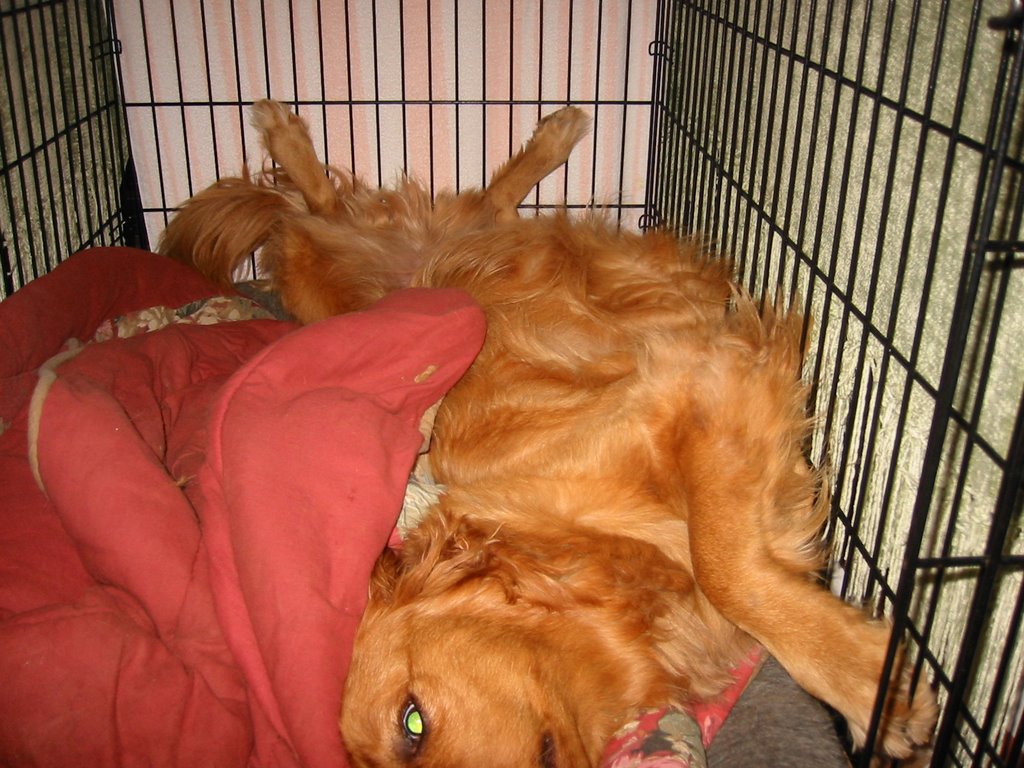
step 12) take a seductive picture of coop.
Cooper! you ol' dog! (to fully appreciate this caption, please go here)
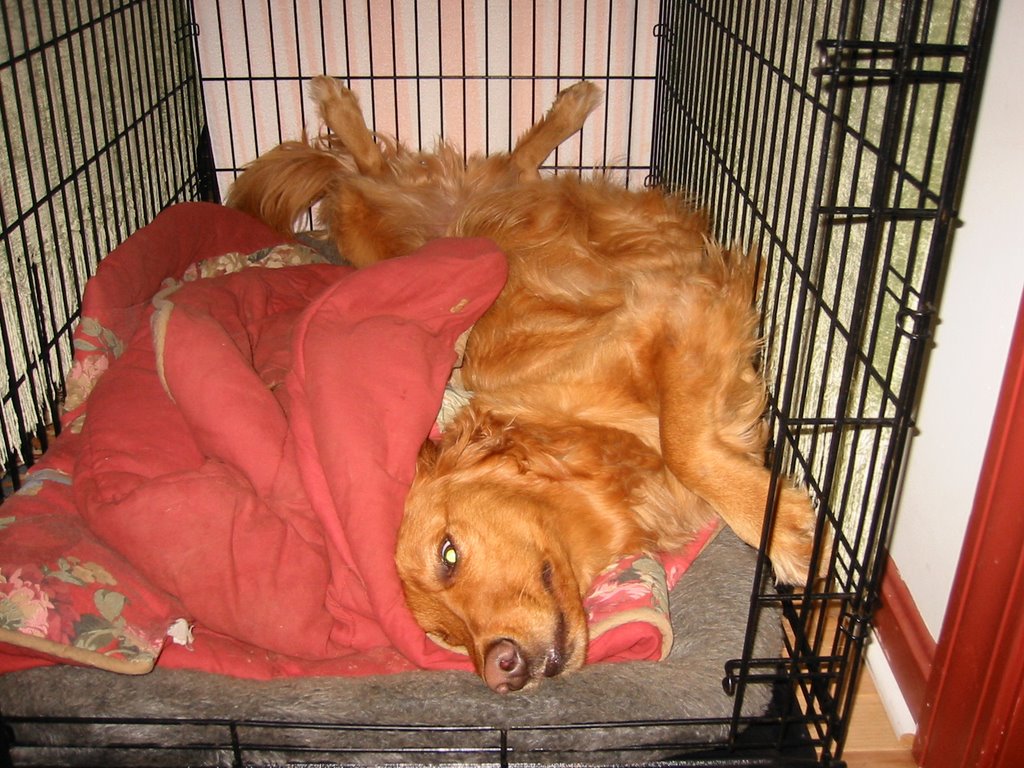
foo
foo
foo
foo
foo
foo
foo
foo
I think this is enough for now. I should get back to work.
next: drawers, wine rack, stemware holders, finishing, and hardware!
* again, the story about the day I created a dato in my fingie to come!
Tuesday, January 02, 2007
furniture project
Like I discussed in that blog, I designed my project after this picture:
craftsman-syle wine cabinet
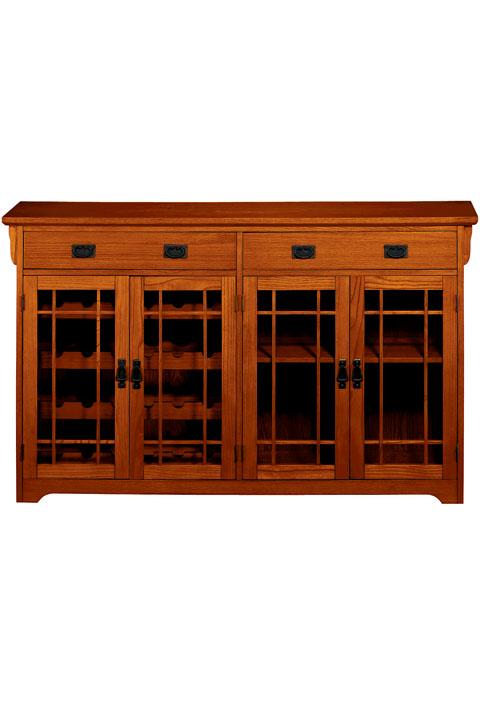
As of this moment, I am 95% finished with the project. I only have to stain, apply laquer, attach the hardware, and do some more this-n-that.
For those of you that want to know some of what goes into a project of this magnitude, I plan to go through the project step-by-step. It will most likely take 2-3 blogs. And for those of you who find this boring, I will make sure to put in some spicy language to liven up the technical details.
step 1) get some fucking wood.
step 2) glue up some panels. I needed to make panels out of multiple boards. most of the wood was between 80" and 100" long, 7/8" thick, and between 4"-9" wide. To make panels (for instance one that is 60"x 7/8" x 16") you have to glue two peices that are 60"x 7/8" x 8" together. get it? I think i made about 3 panels that needed to be 60" x 7/8" x ~17".
step 3) After making the panels, you need to sand them down. When you glue the panels together, they usually aren't flush, so you need to sand them down to a uniform thickness. A surface sander is used for this (see below)
surface sander
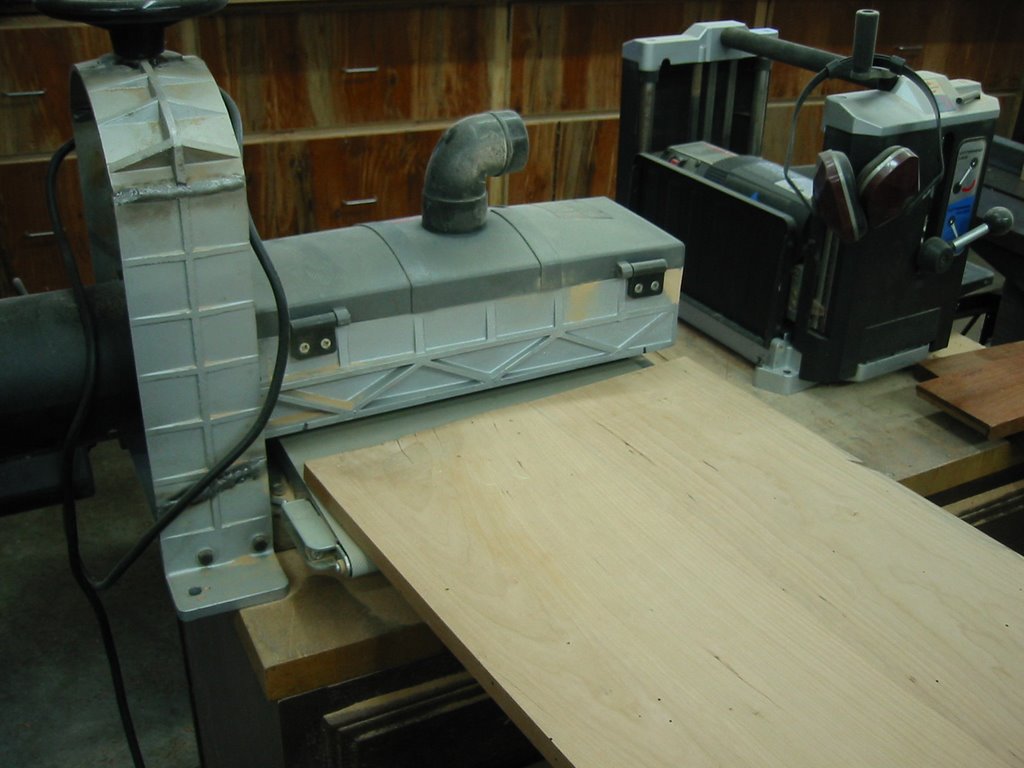
surface sanding is one of the most horrible parts of making furniture. it is tedious and mostly just involves feeding wood into that machine multiple times. Then you have to sand the panels with finer sandpaper because that machine tends to leave marks in the wood (but it knocks down the wood fast!).
preparing, gluing, and sanding these panels took at least 2-3 full days. They looked somethign like this after i was done:
some small panels (some of the 60" panels that were cut in half for shelves)
notice the line on the top one. that is where two boards meet and are glued.

step 4) create the sides of the carcase (the carcase is the 'skeleton' of the peice)
Instead of maintain the craftsman look of the picture I had (see first picture), i decided to make this a more traditional colonial peice. This fits in better with furniture I have made before, and most of what we already own. plus I really like tradiational/colonial furniture. They are more classy and difficult to make then some craftsmen and contemporary designs.
A typical trademark of a traditional/colonial motief are recessed panels as well as bullnoses and ogey-type details. (whereas craftsmen style is more simple )
The panels I made look like this:
recessed panels with rail and stile construction

Buliding this took 5 seperate boards. 4 boards for the rail and styles (the frame) around that center panel. 1 big board in the middle. The idea is that wood normally expands perpendicular to the grain. Whenever you have a large panel of wood that you don't want to expand and contract (like a door for instance), you should use this type of construction. The center panel floats inside of the frame, and is allowed to expand and contract without making the overall width change. The frame part doesn't expand much due to it's realitive small width and the fact that the panel isn't glued into the frame.
the rails and styles were cut using a 2 special types of router blades. one of the blades cuts out this detail:
rails and styles before being cut to size

4 peices like this create the frame and that groove that you see holds the center board.
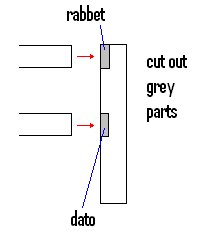
step 5) create datos and rabbets in all of the panels. for a quick discussion on jointery go here.
datos are grooves created in the wood to accept another peice of wood. Rabbets are similar but on the end of the board. I think this expert drawing sums it up:
rabbet/dato joint construction
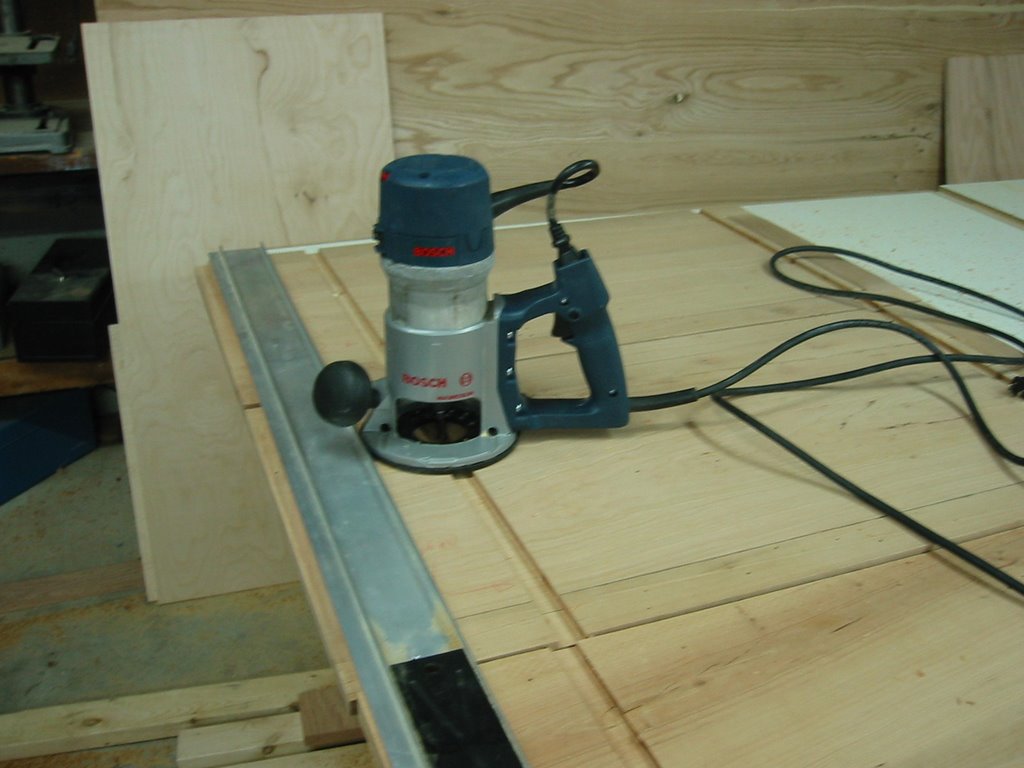
to create the datos and rabbets, you can run them over a table saw with a dato blade, or use a router with a guide (and some other ways as well). I chose the latter because I like how dangerous it is*. below you can see the router, the guide (Aluminum thing below), and some of my cut datos.
step 6) glue together the carcase.
after creating the datos and rabbets, all of those panels were put together to form the carcase of the project. Here is a photo of the carcase put together, glued, and clamped (the long metal things). The front of the peice is facing towards the celing, and the bottom is facing left. the two little cubby holes on the right will be the shelves. you can see some of one of the recessed panel dohickies facing the camara.

This probably doesn't look like much. but this was probably 50% of the project. This most likely took 4-5 full days to get to this point! From this point on, the project really started to take shape.
More to come next time!
* how I created a dato in my middle finger (including vomit-inducing pictures) back in summer 2002 to come.
![]()