Tuesday, January 23, 2007
furniture project 3
I can tell people aren't that interested with the ins-and-outs of how I made this wine cabinet. So I will make the conclusion of this story brief:
step 13)drawers: cut the dovetails.
this required a dovetail jig and a router to do.
as you can see, dovetails create dovetail-shaped "pins" that fit together like a puzzle. There is no room for error.
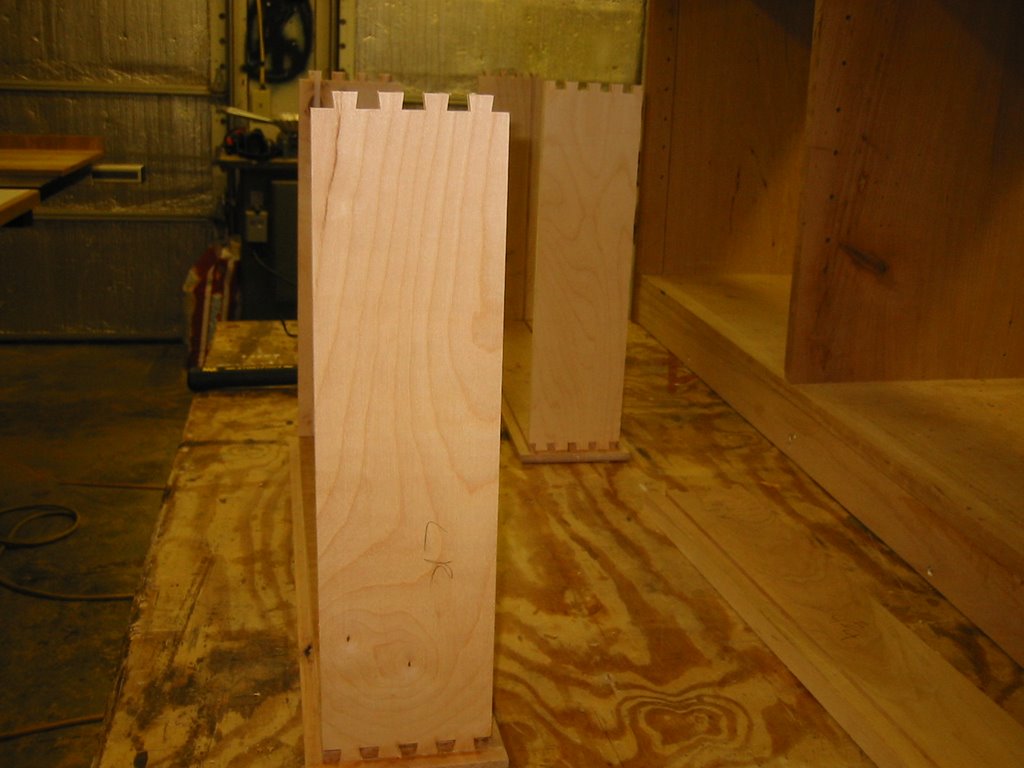
I really like this look, and most high-quality drawers are made this way.
this seemed like it is fairly complicated to do, and I had never done it before, but after reading the instructions to the jig, it was quite easy. It did, however, take alot of prep time and any mistakes are costly. I made one mistake, but it was an easy fix.
step 14) drawers: glue them together
this is actually kinda difficult. you have to put togeher 5 peices of a puzzle at once, within 10 minutes or so or your glue will dry.
the bottom of the drawer is pre-finished cherry, the sides are birch plywood, and the front and back is cherry hardwood. As you will see in the finished product, the wood contrasts really look good!
here is a picture of a drawer glued up and clamped.

step 15) build the wine rack.
I wanted this peice to be able to be used as a wine cabinet, or just a curio/china cabinet. With this in mind I wanted to be able to have:
a) a removable wine rack
b) hidden stemware holders
c) glass doors
d) have adjustable interior shelves (for different sized curios)
the stemware holder and glass doors were a snap compared to the removeable wine rack.
I wanted my wine rack to be the popular "X" type, where bottles are essentially stacked on one another. (as opposed to single cubby-holes per wine bottle)
After talking to some people, and thinking and drawing up some ideas, i opted to make a 2 half-lap panels that had sloppy enough engagments to where they could fold a little bit and slip out of the interior of the cabinet.
To get a better idea of what I am saying, make the Vulcan hand sign in both hands. now make it to where the web inbetween the middle and ring finger of both hands touch. see how if you look at your hands right, they look like an "x"? that is what i needed to do.
unfortunatly I don't have many pictures of this and I am certain you are still lost. So I wasted everyones time with that half-hearted explanation. perfect.
step 16) build the stemware holders
this was pretty easy. I made a bunch of "T"s and 2 "L"s and screwed them on. They weren't going to be seen at all with the doors closed (see step 15 a) so it was okay If they were a bit sloppy. It did actually take me all lunch to figure out the dimesions of them, so that I could hold the maximum numbers of wine glasses, and have them be symmetric.
this is the view as you look into the cabinet from the front. glasses are turned upside down and the bases are inserted into those slots.

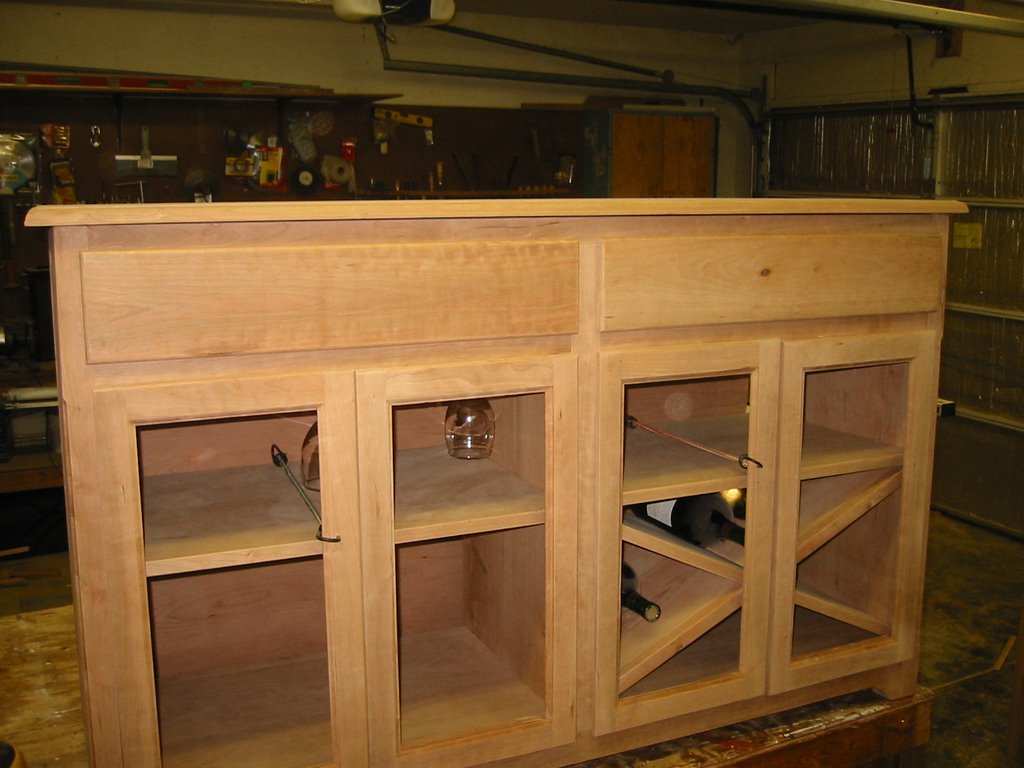
step 17) mock up the doors and drawers
with the drawers and doors finished, I needed to make sure everything fit before staining. It was a good thing I did too, because the doors needed to be trimmed to fit!
here is a picture of the mock up. I also put on the back, so I could get a vision of the final product. The doors are held on with bungee cords. those wont be permenent. :) The wine bottles inside might give you an idea of what I was talking about in step 15. also, there are some wineglasses in their holders.
step 18) drawer guides.
I had to make drawer guides to make sure the drawers slide easily.
step 19) Staining, finshing, and install hardware
staining took awhile because I couldn't make up my mind. I tried mutliple test-runs on parts of the cabinet you could not see. I asked many people, and then ended up making the wrong choice.
Long story short, it took about 3 full days to sand, wash(partially seal), stain, sand,re-stain, sand, and put 3 coats of lacquer on it. I made sure to get it really smooth. certain parts are as slick as glass (like the top, which is the first thing I check for on any peice of furniture I touch).
hardware (pulls and hinges) was easy. Just drill holes and make sure they are lined up with one another. The hinges on the doors were actually a bit tricky, but I was happy to see that the gap in between them was very small and looks great!
I fastened the top of the peice with screws.
the last step was to nail the back of the peice on, and then the glass in the slots of the doors and secure them with little wooden strips I cut.
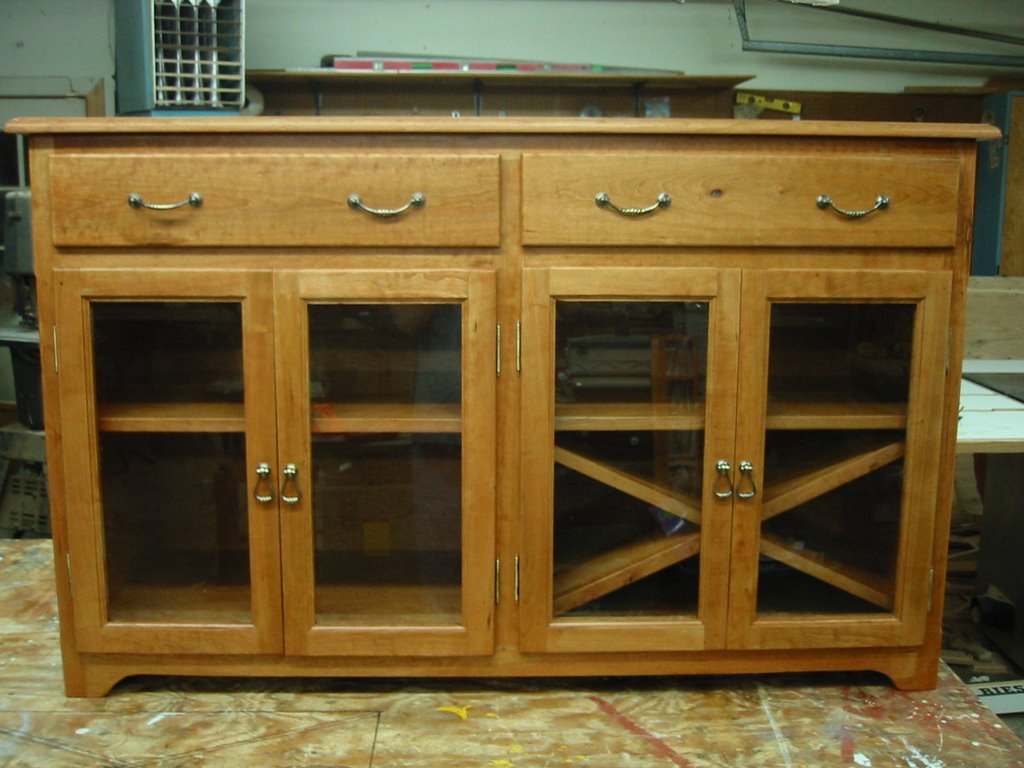
The end. I think it looks pretty glam. I have included multiple shots so that everyone can admire the various things I talked about (mistake on the top, paneled sides, the smooth top, dove-tailed drawers)
full frontal
top. mirror shine! boo-ya! (click on this picture to see the beauty of the wood I chose for the top)
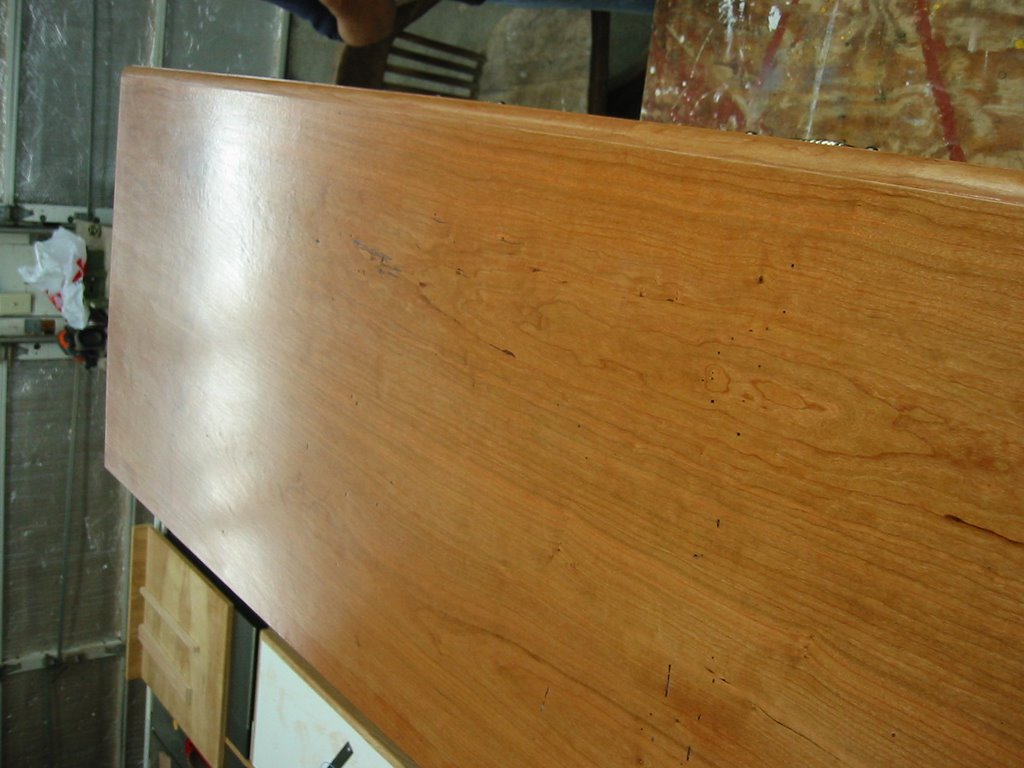
side view.

# posted by fooiemcgoo : 9:52 AM

Comments:
<< Home

I thoroughly enjoyed this series of blogs. I have no discernable furniture making skills. I have only recently learned that you have to be careful with regards to expansion/contraction of certain parts of furniture.
Anyway, did you make this for yourself? What do you anticipate it's value to be? What were the material costs? How much time did it take you to build.
Relatedly, teh wif and I are considering procuring an entertainment center for our living room. We have yet to look for any specific pieces, but I'm anticipating this will be an expensive adventure.
# posted by  : 6:23 AM
: 6:23 AM
thanks for the kind words everyone.
bigd, I am glad you enjoyed them. I thought that most of the people visiting this site were women and my male friends who have little building acumen and bonk themselves on the head with hammers when they try to use them.
to answer your questions:
yes, i made this for myself.
I would estimate the cost of this peice to be from $2000 - $2500. That is based on a) the assumption that someone would commission it, which would make it "custom" b) it is solid cherry and c) that $2250= 3x (cost of materials) which was about $600 of wood and $150 of hardware and consumables.
I wouldn't pay that much for this in a store though. in fact, my in-laws just bought an entertainment center that kinda looked like this. it was about the same dimensions and had glass fronts and whatnots. they paid about $500 online. of course, it wasn't solid, and was shipped in a flat box and you had to assemble it with cheap anchors and stuff. but it still looks nice and is a good value. if you are intersted i will find out where it came from.
I think it took me about 100 hours to build. I had 2 weeks off work around christmas. that is a long time I know, but alot of it was design time, being-overly cautious, learning-curve (i hadn't made a peice like this in several years), helping my dad (who is making one too), and making mistakes that had to be fixed. Now that i know how to do it, and have some more practice, I could probably cut that to 50 hours or so.
if you are handy at all and have the tools, you might consider building an entertainment center. I might do this myself. If you use hardwood plywood (oak), you can probably do it for less than $200. and you can custom fit it for your room-size, tv size, and stain it to match other stuff in the house.
i have been meaning to draw-up a design for one, if I do I will forward it to you via bean.
I am fairly handy, most of which I learnt when we built our house a couple years ago. But, I get bored really quick with finish work. Building a deck, awesome, tons of fun. Painting, I lose patience after about 10 minutes and make a mess out of everything.
Also, I don't have any tools required for building furniture.
Seems like you could make some good money if you could convince people to utilize your skills for custom furniture work.
Good job, it looks great.
Also, I don't have any tools required for building furniture.
Seems like you could make some good money if you could convince people to utilize your skills for custom furniture work.
Good job, it looks great.
# posted by : 7:45 AM
: 7:45 AM
a relative of a friend of mine makes furniture for a living (in upstate ny). he has been at it for decades, and he does ok, but isnt making a killing.
# posted by : 8:09 AM
: 8:09 AM
I know what you mean about the wine X. I actually pictured it before reading your vulcan explanation. I'm looking forward to seeing the piece in person. Do you feel it isn't as valuable as the lingerie dresser since you didn't lose a body part making it?
You have some serious furniture making skills. One time I made a birdhouse from a kit and painted a Texas flag on it and hung it up. Then some wasps moved in. I was sad. Anyway, you should be really proud of that cabinet, Foo. It looks amazing.
thanks tera.
by the way, I heard that you can keep wasps out of stuff like that by putting alchol-soaked cotton balls in there.
I totally made that up.
Sass, to answer your question, yes, I cherish the lingerie chest of drawers more because of that reason. Also becasue it was much more difficult to make, and I was even more anal retentive about it!
there is neigh a blemish on the entire peice! booya.
I have a hard time believing that the other piece took longer than this one. Just because of the more drawers?
I had already put alcohol soaked cotton balls into my porch light before I saw that you were kidding.
I had already put alcohol soaked cotton balls into my porch light before I saw that you were kidding.
it was more difficult because:
1) we (my dad) didn't have as nice as tools. (mostly because he got just recently got a "professional" table saw)
2)It had more joints. (like you said, becasue of the many drawers)
3) drawers. drawers are pretty time consuming to make.
4) it was smaller peice, and had smaller tolerances.
5) the wood I used was wood that was recycled tounge-and-groove paneling that was in a doctor's office. Before I could even start to use it, it had to be
a) nails pulled
b) figure out how to get the cut i want while avoiding blemishes and nail-holes
c)planed down
it also was hard to work with because it was dry and splintery.
but it was also white walnut. walnut is good stuff. my dad said that white walnut is very rare in north america these days. but, he also makes stuff up.
i need to post a pic of the lingerie dresser. i think i will do that.
Post a Comment
1) we (my dad) didn't have as nice as tools. (mostly because he got just recently got a "professional" table saw)
2)It had more joints. (like you said, becasue of the many drawers)
3) drawers. drawers are pretty time consuming to make.
4) it was smaller peice, and had smaller tolerances.
5) the wood I used was wood that was recycled tounge-and-groove paneling that was in a doctor's office. Before I could even start to use it, it had to be
a) nails pulled
b) figure out how to get the cut i want while avoiding blemishes and nail-holes
c)planed down
it also was hard to work with because it was dry and splintery.
but it was also white walnut. walnut is good stuff. my dad said that white walnut is very rare in north america these days. but, he also makes stuff up.
i need to post a pic of the lingerie dresser. i think i will do that.
<< Home
![]()