Tuesday, January 02, 2007
furniture project
I have had the past 2 weeks off of work. This has given me plenty of time to work on the wine cabinet that I discussed in this blog.
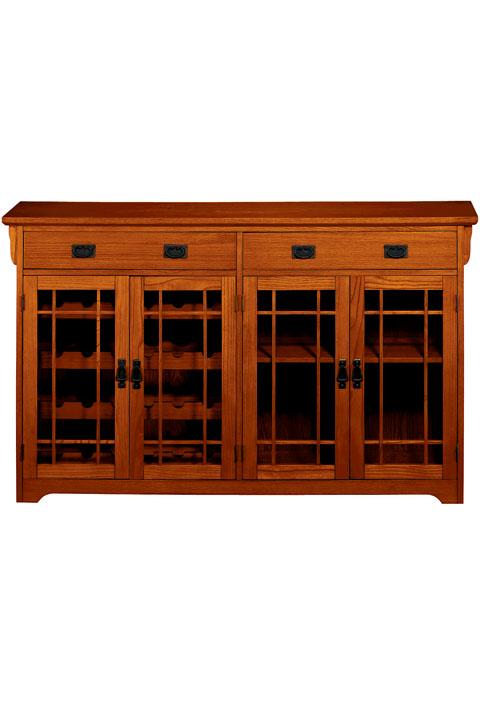
Like I discussed in that blog, I designed my project after this picture:
craftsman-syle wine cabinet

As of this moment, I am 95% finished with the project. I only have to stain, apply laquer, attach the hardware, and do some more this-n-that.
For those of you that want to know some of what goes into a project of this magnitude, I plan to go through the project step-by-step. It will most likely take 2-3 blogs. And for those of you who find this boring, I will make sure to put in some spicy language to liven up the technical details.
step 1) get some fucking wood.
step 2) glue up some panels. I needed to make panels out of multiple boards. most of the wood was between 80" and 100" long, 7/8" thick, and between 4"-9" wide. To make panels (for instance one that is 60"x 7/8" x 16") you have to glue two peices that are 60"x 7/8" x 8" together. get it? I think i made about 3 panels that needed to be 60" x 7/8" x ~17".
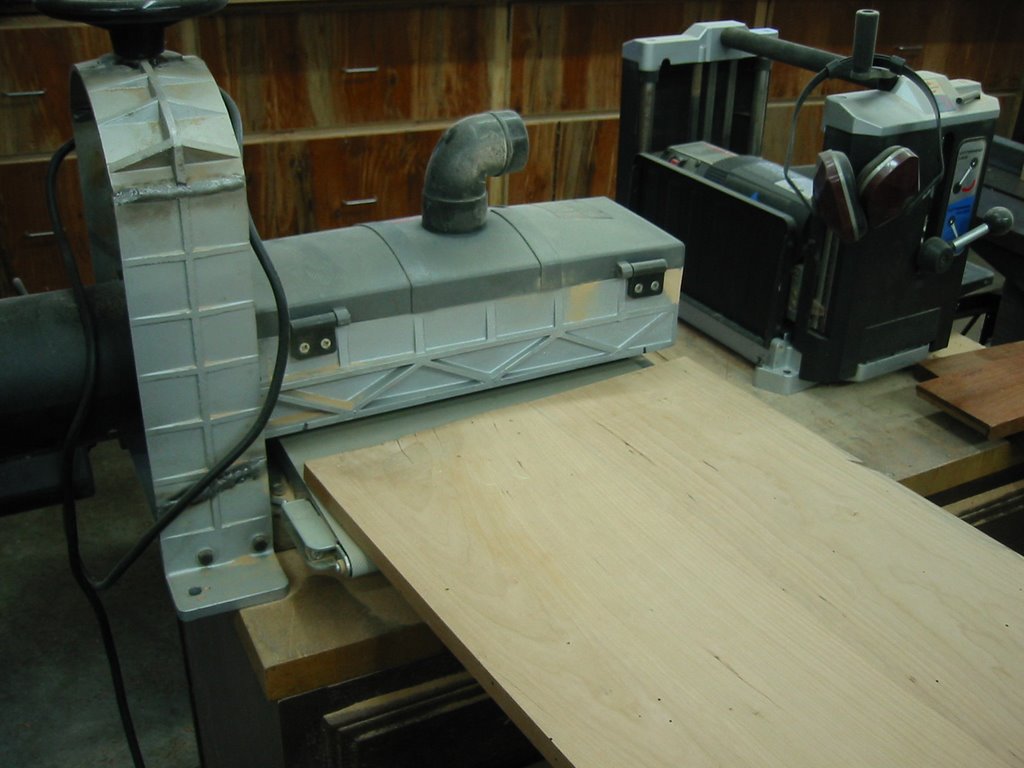
step 3) After making the panels, you need to sand them down. When you glue the panels together, they usually aren't flush, so you need to sand them down to a uniform thickness. A surface sander is used for this (see below)
surface sander

surface sanding is one of the most horrible parts of making furniture. it is tedious and mostly just involves feeding wood into that machine multiple times. Then you have to sand the panels with finer sandpaper because that machine tends to leave marks in the wood (but it knocks down the wood fast!).
preparing, gluing, and sanding these panels took at least 2-3 full days. They looked somethign like this after i was done:
some small panels (some of the 60" panels that were cut in half for shelves)
notice the line on the top one. that is where two boards meet and are glued.

step 4) create the sides of the carcase (the carcase is the 'skeleton' of the peice)
Instead of maintain the craftsman look of the picture I had (see first picture), i decided to make this a more traditional colonial peice. This fits in better with furniture I have made before, and most of what we already own. plus I really like tradiational/colonial furniture. They are more classy and difficult to make then some craftsmen and contemporary designs.
A typical trademark of a traditional/colonial motief are recessed panels as well as bullnoses and ogey-type details. (whereas craftsmen style is more simple )
The panels I made look like this:
recessed panels with rail and stile construction

Buliding this took 5 seperate boards. 4 boards for the rail and styles (the frame) around that center panel. 1 big board in the middle. The idea is that wood normally expands perpendicular to the grain. Whenever you have a large panel of wood that you don't want to expand and contract (like a door for instance), you should use this type of construction. The center panel floats inside of the frame, and is allowed to expand and contract without making the overall width change. The frame part doesn't expand much due to it's realitive small width and the fact that the panel isn't glued into the frame.
the rails and styles were cut using a 2 special types of router blades. one of the blades cuts out this detail:
rails and styles before being cut to size

4 peices like this create the frame and that groove that you see holds the center board.
step 5) create datos and rabbets in all of the panels. for a quick discussion on jointery go here.
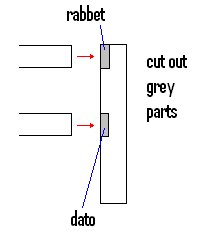
datos are grooves created in the wood to accept another peice of wood. Rabbets are similar but on the end of the board. I think this expert drawing sums it up:
rabbet/dato joint construction

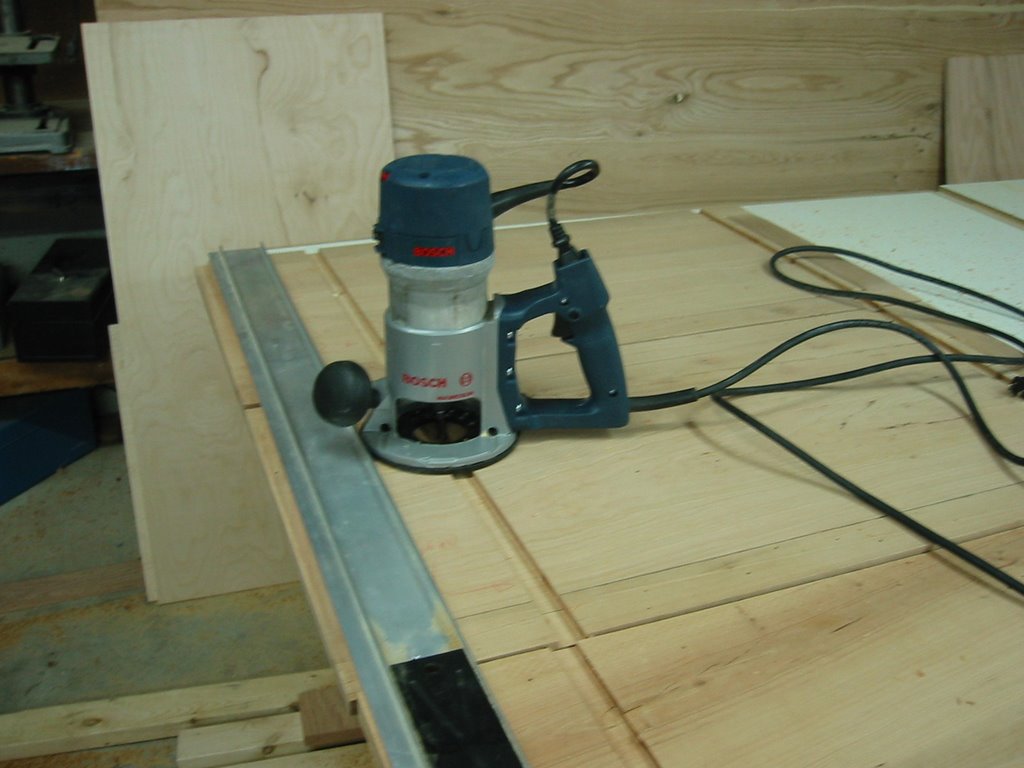
to create the datos and rabbets, you can run them over a table saw with a dato blade, or use a router with a guide (and some other ways as well). I chose the latter because I like how dangerous it is*. below you can see the router, the guide (Aluminum thing below), and some of my cut datos.

step 6) glue together the carcase.
after creating the datos and rabbets, all of those panels were put together to form the carcase of the project. Here is a photo of the carcase put together, glued, and clamped (the long metal things). The front of the peice is facing towards the celing, and the bottom is facing left. the two little cubby holes on the right will be the shelves. you can see some of one of the recessed panel dohickies facing the camara.

This probably doesn't look like much. but this was probably 50% of the project. This most likely took 4-5 full days to get to this point! From this point on, the project really started to take shape.
More to come next time!
* how I created a dato in my middle finger (including vomit-inducing pictures) back in summer 2002 to come.
Like I discussed in that blog, I designed my project after this picture:
craftsman-syle wine cabinet
As of this moment, I am 95% finished with the project. I only have to stain, apply laquer, attach the hardware, and do some more this-n-that.
For those of you that want to know some of what goes into a project of this magnitude, I plan to go through the project step-by-step. It will most likely take 2-3 blogs. And for those of you who find this boring, I will make sure to put in some spicy language to liven up the technical details.
step 1) get some fucking wood.
step 2) glue up some panels. I needed to make panels out of multiple boards. most of the wood was between 80" and 100" long, 7/8" thick, and between 4"-9" wide. To make panels (for instance one that is 60"x 7/8" x 16") you have to glue two peices that are 60"x 7/8" x 8" together. get it? I think i made about 3 panels that needed to be 60" x 7/8" x ~17".
step 3) After making the panels, you need to sand them down. When you glue the panels together, they usually aren't flush, so you need to sand them down to a uniform thickness. A surface sander is used for this (see below)
surface sander
surface sanding is one of the most horrible parts of making furniture. it is tedious and mostly just involves feeding wood into that machine multiple times. Then you have to sand the panels with finer sandpaper because that machine tends to leave marks in the wood (but it knocks down the wood fast!).
preparing, gluing, and sanding these panels took at least 2-3 full days. They looked somethign like this after i was done:
some small panels (some of the 60" panels that were cut in half for shelves)
notice the line on the top one. that is where two boards meet and are glued.

step 4) create the sides of the carcase (the carcase is the 'skeleton' of the peice)
Instead of maintain the craftsman look of the picture I had (see first picture), i decided to make this a more traditional colonial peice. This fits in better with furniture I have made before, and most of what we already own. plus I really like tradiational/colonial furniture. They are more classy and difficult to make then some craftsmen and contemporary designs.
A typical trademark of a traditional/colonial motief are recessed panels as well as bullnoses and ogey-type details. (whereas craftsmen style is more simple )
The panels I made look like this:
recessed panels with rail and stile construction

Buliding this took 5 seperate boards. 4 boards for the rail and styles (the frame) around that center panel. 1 big board in the middle. The idea is that wood normally expands perpendicular to the grain. Whenever you have a large panel of wood that you don't want to expand and contract (like a door for instance), you should use this type of construction. The center panel floats inside of the frame, and is allowed to expand and contract without making the overall width change. The frame part doesn't expand much due to it's realitive small width and the fact that the panel isn't glued into the frame.
the rails and styles were cut using a 2 special types of router blades. one of the blades cuts out this detail:
rails and styles before being cut to size

4 peices like this create the frame and that groove that you see holds the center board.
step 5) create datos and rabbets in all of the panels. for a quick discussion on jointery go here.
datos are grooves created in the wood to accept another peice of wood. Rabbets are similar but on the end of the board. I think this expert drawing sums it up:
rabbet/dato joint construction
to create the datos and rabbets, you can run them over a table saw with a dato blade, or use a router with a guide (and some other ways as well). I chose the latter because I like how dangerous it is*. below you can see the router, the guide (Aluminum thing below), and some of my cut datos.
step 6) glue together the carcase.
after creating the datos and rabbets, all of those panels were put together to form the carcase of the project. Here is a photo of the carcase put together, glued, and clamped (the long metal things). The front of the peice is facing towards the celing, and the bottom is facing left. the two little cubby holes on the right will be the shelves. you can see some of one of the recessed panel dohickies facing the camara.

This probably doesn't look like much. but this was probably 50% of the project. This most likely took 4-5 full days to get to this point! From this point on, the project really started to take shape.
More to come next time!
* how I created a dato in my middle finger (including vomit-inducing pictures) back in summer 2002 to come.
# posted by fooiemcgoo : 2:43 PM

Comments:
<< Home

that is freaky. it is a cool design.
btw, per our conversation last night, i think you can easily build this out of oak (or any hardwood) veneer plywood and screws. you can also buy rolls of iron-on veneer to cover the edges of the cut plywood. you guys don't have to buy any hardwood at all (moldings etc).
you can use screws to build everything and plug em'!
that is the cheap and faster way to build it, with nothing but a table saw and a drill (and plugs).
but the design has to be much closer to the craftsmen design in the picture.
the end.
Post a Comment
btw, per our conversation last night, i think you can easily build this out of oak (or any hardwood) veneer plywood and screws. you can also buy rolls of iron-on veneer to cover the edges of the cut plywood. you guys don't have to buy any hardwood at all (moldings etc).
you can use screws to build everything and plug em'!
that is the cheap and faster way to build it, with nothing but a table saw and a drill (and plugs).
but the design has to be much closer to the craftsmen design in the picture.
the end.
<< Home
![]()